Multimedia Content
This section allows you to enrich your course with visual and audio elements that enhance engagement and support diverse learning styles. From uploading images and videos to embedding audio and interactive content, multimedia tools help bring your course to life. Use these features to create a dynamic, inclusive learning experience that aligns with your content and audience needs.
Explore tutorials in our Tutorial Video Library.
Insert Images
Images are a powerful way to enhance your course content and improve learner engagement. Whether you're using high-quality stock visuals, uploading your own graphics, or generating unique images with AI, Coursebox offers flexible options to suit your content style. This section walks you through the different ways you can incorporate images to support your learning objectives and create a more visually compelling experience.
Go to the bottom menu on your Couse editing page and select multimedia > images
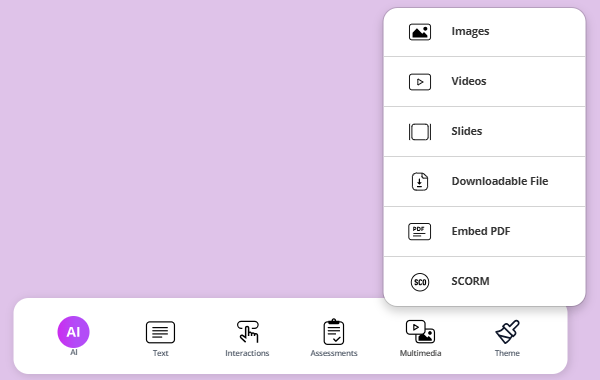
When the pop up shows, then you can select any of the following features:
Stock Images
Coursebox allows you to easily enhance your content by selecting high-quality stock images directly within the platform. From the top menu, you can browse and insert visuals that align with your lesson themes, making your course more engaging and visually appealing.

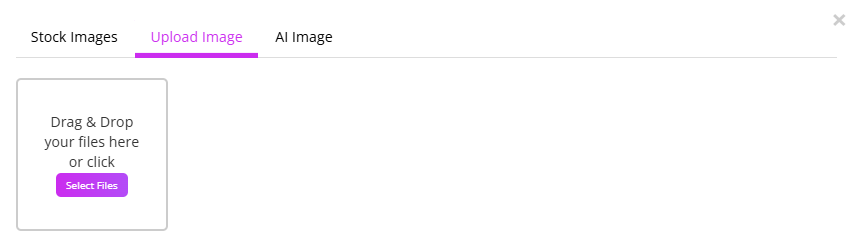
Uploading Images
In addition to stock images, Coursebox makes it simple to personalise your content by uploading your own visuals. Just drag and drop images directly into the editor to enhance lessons with custom graphics, branding, or relevant media.
Generate an AI Image
Coursebox lets you create custom visuals using AI image generation. You can access this feature as above or from the bottom menu clicking on AI > Images
Then, simply write a prompt describing the type of image you need, and the platform will generate a unique image to match your content—perfect for tailoring visuals to specific topics or themes.
Note: In Coursebox, generated images cannot be edited directly (there is no image-editing mode). To make changes, you’ll need to regenerate a new version of the image using a refined or customized prompt, then replace the image in your course with the updated version.
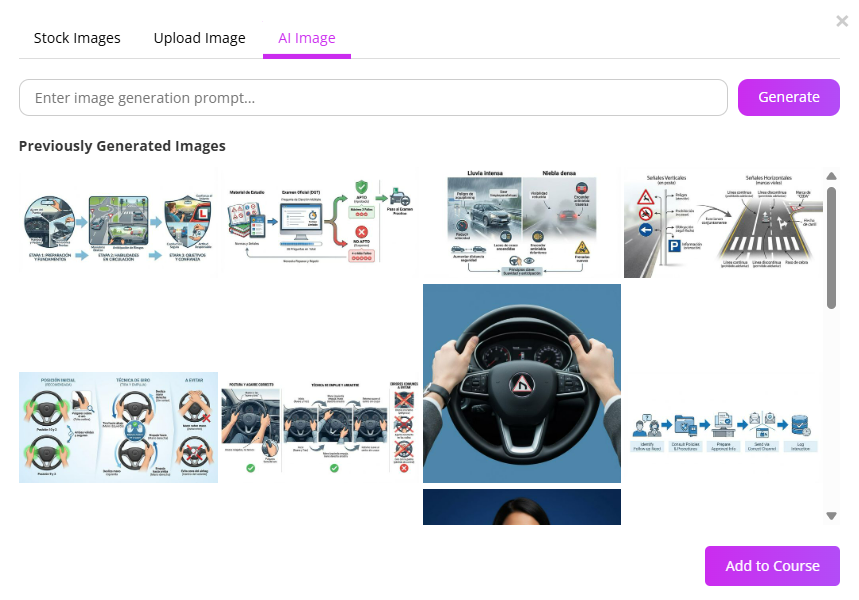
Note: If Coursebox does not allow you to generate more images, it is usually because you have reached the image-generation credit limit included in your plan. Image credits typically reset according to your billing cycle (the date you subscribed), not necessarily on the first day of the month.
Add Video
Video is one of the most powerful tools for engaging learners and delivering content in a dynamic, accessible way. Coursebox gives you multiple options to incorporate video into your course—whether through AI-generated videos, direct uploads, or external video links. These tools allow you to customise the look, feel, and delivery of your video content, helping you create a rich, branded learning experience that resonates with your audience.
Watch the video below, or explore more tutorials in our Tutorial Video Library.
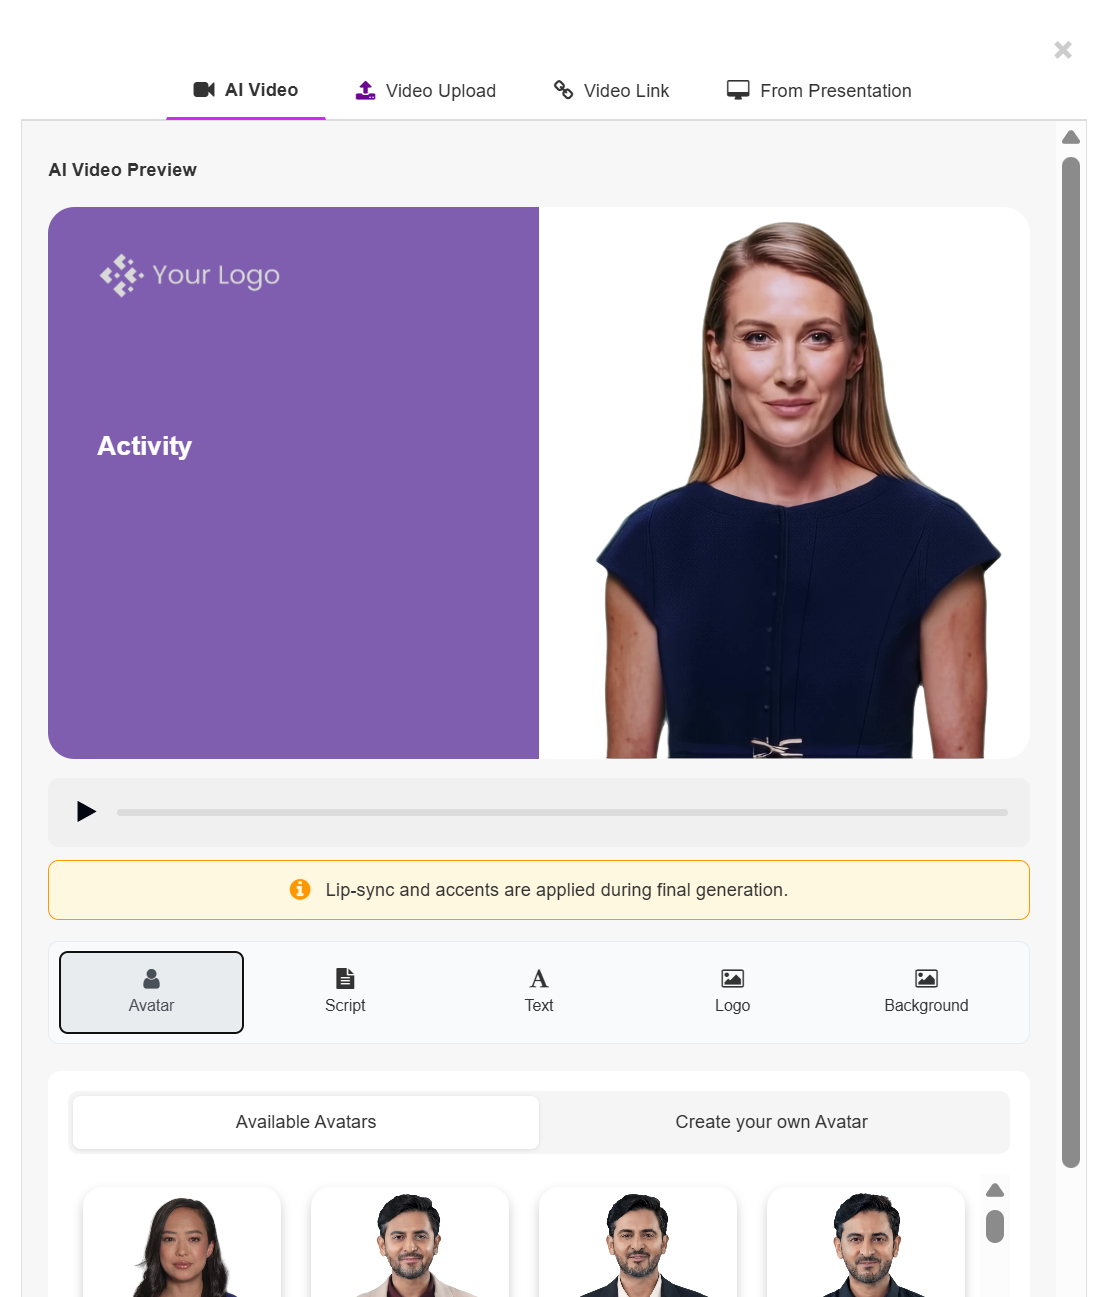
AI Video
Coursebox’s AI Video feature allows you to create branded, engaging videos directly within your course. Customise everything from avatars and scripts to voice accents and backgrounds—no video editing skills required. These AI-generated videos help personalise your content and improve learner engagement.
You can customise:
Avatar presenter
Script
Voice and accent
On-screen text
Logo
Background (template, image upload, or colour)
Playback settings
The Steps are:
Mouse over the AI icon and select Videos
Ensure the AI Video tab is selected (not Video Upload or Video Link).
Select the avatar you would like to convey your content from the extensive list of options
Choose your Avatar
You can choose from Available Avatars
Browse the pre-built avatar library.
Click an avatar to select it.
The preview will update instantly.
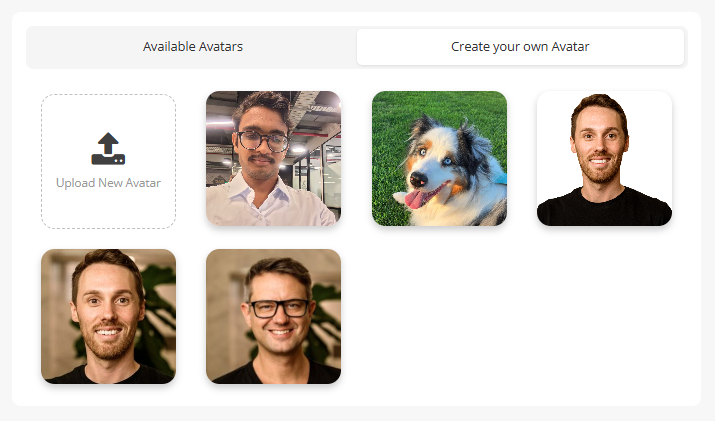
You can also Create Your Own Avatar
Select Create your own Avatar.
Upload a clear front-facing image.
Coursebox will generate an animated avatar based on the likeness.
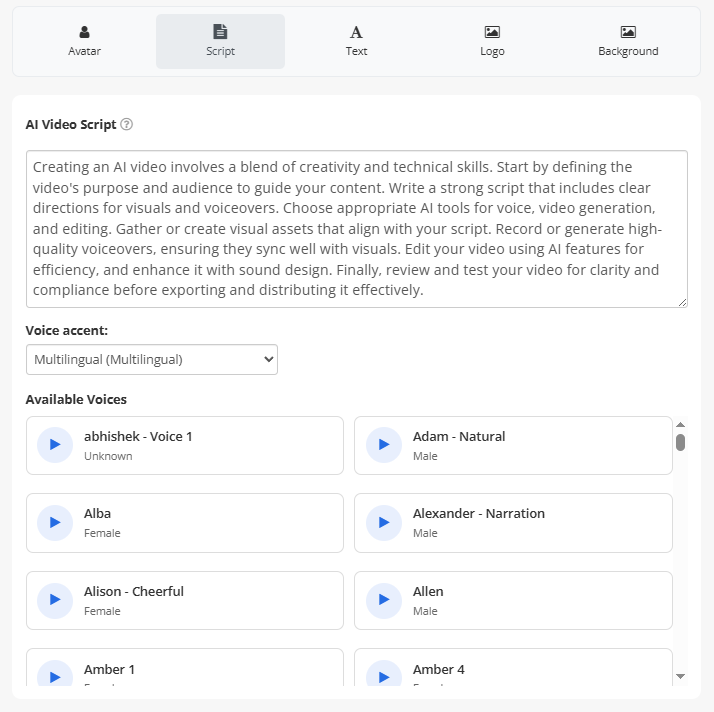
Add and Edit Your Script
Write the script that you would like your avatar to say when the learner plays the video. Note; the script will be AI generated from the content on the current page that you can edit as you wish
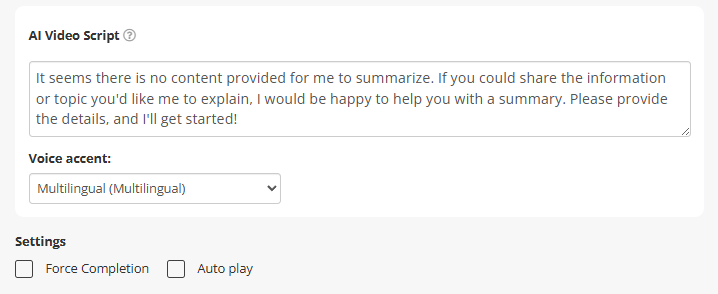
Select the voice you wish to use (also in the script editing page). Note that the voices are not tethered to the AI avatar you've chosen. You can match any voice with any avatar
Modify On-Screen Text
From the Text tab. You can:
Edit the displayed title text.
Change text colour.
Adjust visual emphasis. This text appears in the left content block of the video layout.

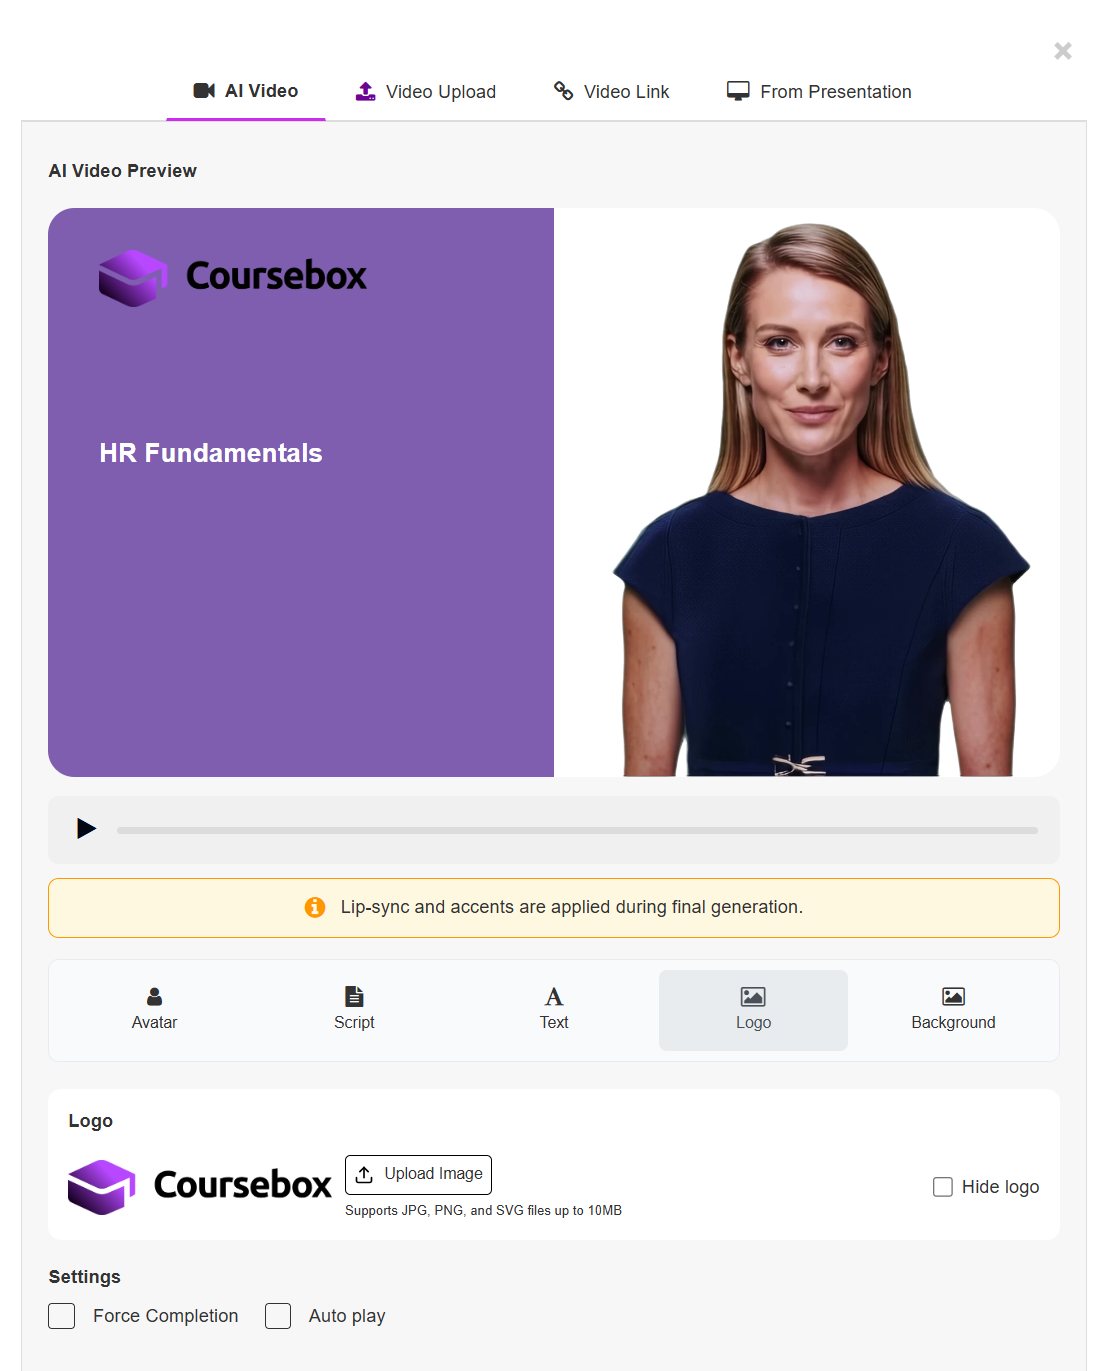
Add or Modify Logo
Click the Logo tab:
Upload a logo (JPG, PNG, or SVG up to 10MB).
Hide the logo using the checkbox if not required.
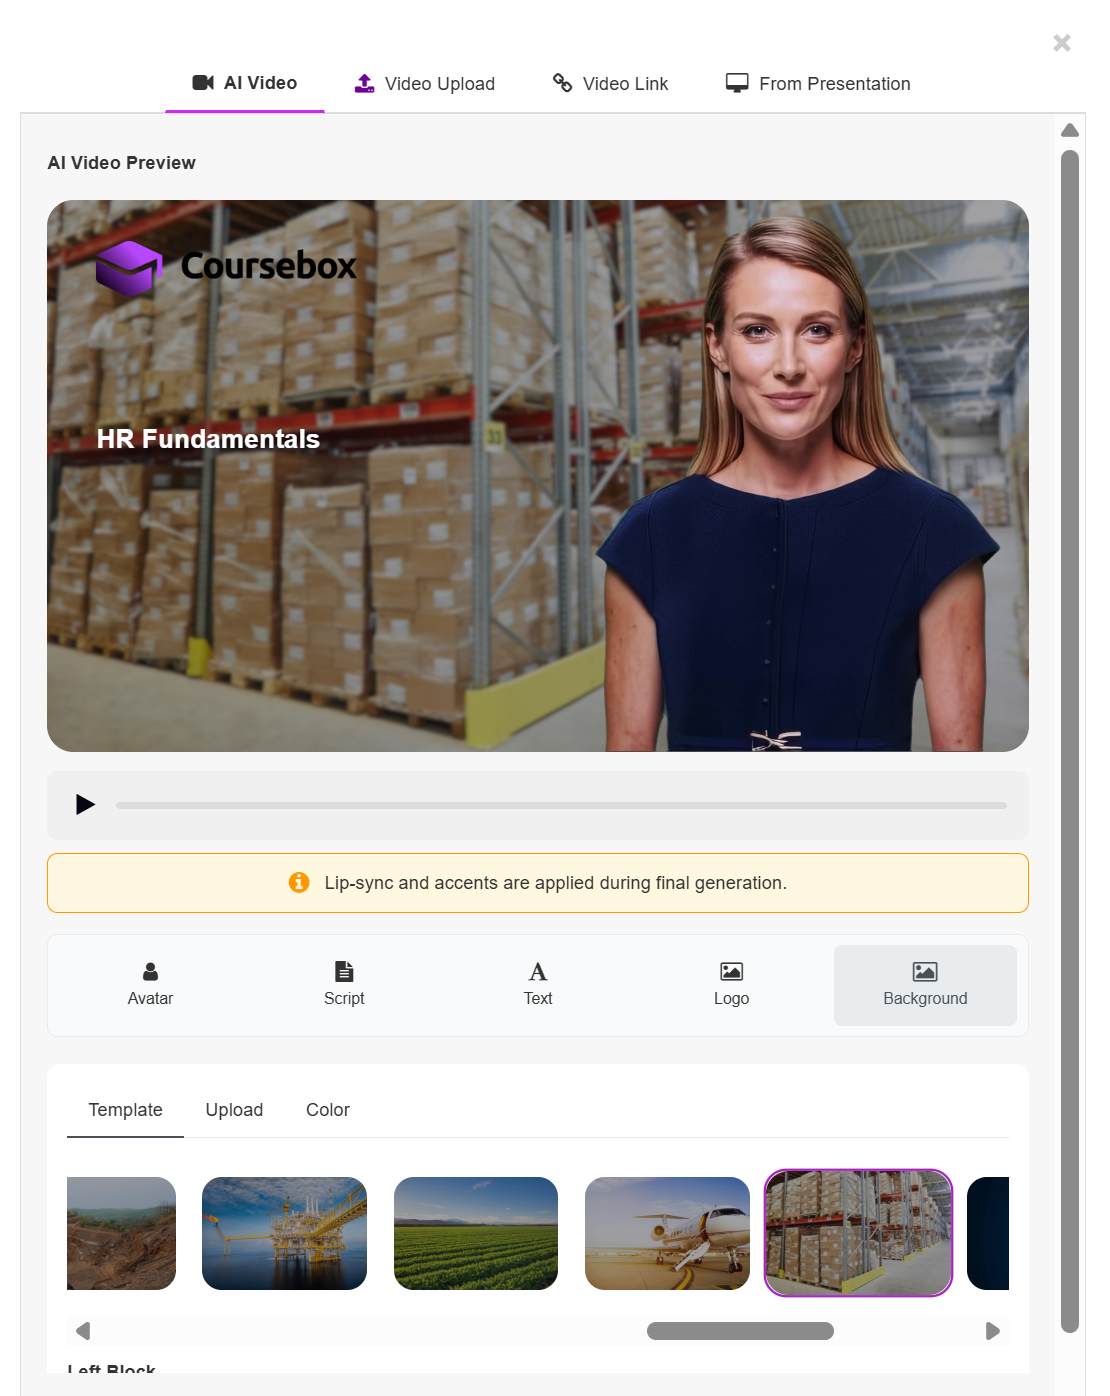
Customise the Background
Click the Background tab.
You have three options:
Option 1: Template Background
Select from pre-designed background templates.
Click a template to apply it.
The preview updates immediately.
Option 2: Upload Background
Click the Upload tab.
Upload your own image.
The selected image will appear behind the avatar.
Use branded environments, office scenes, classrooms, or contextual visuals.

Option 3: Background Colour
Click the Color tab.
Select a background colour.
Adjust the left block colour separately if required.
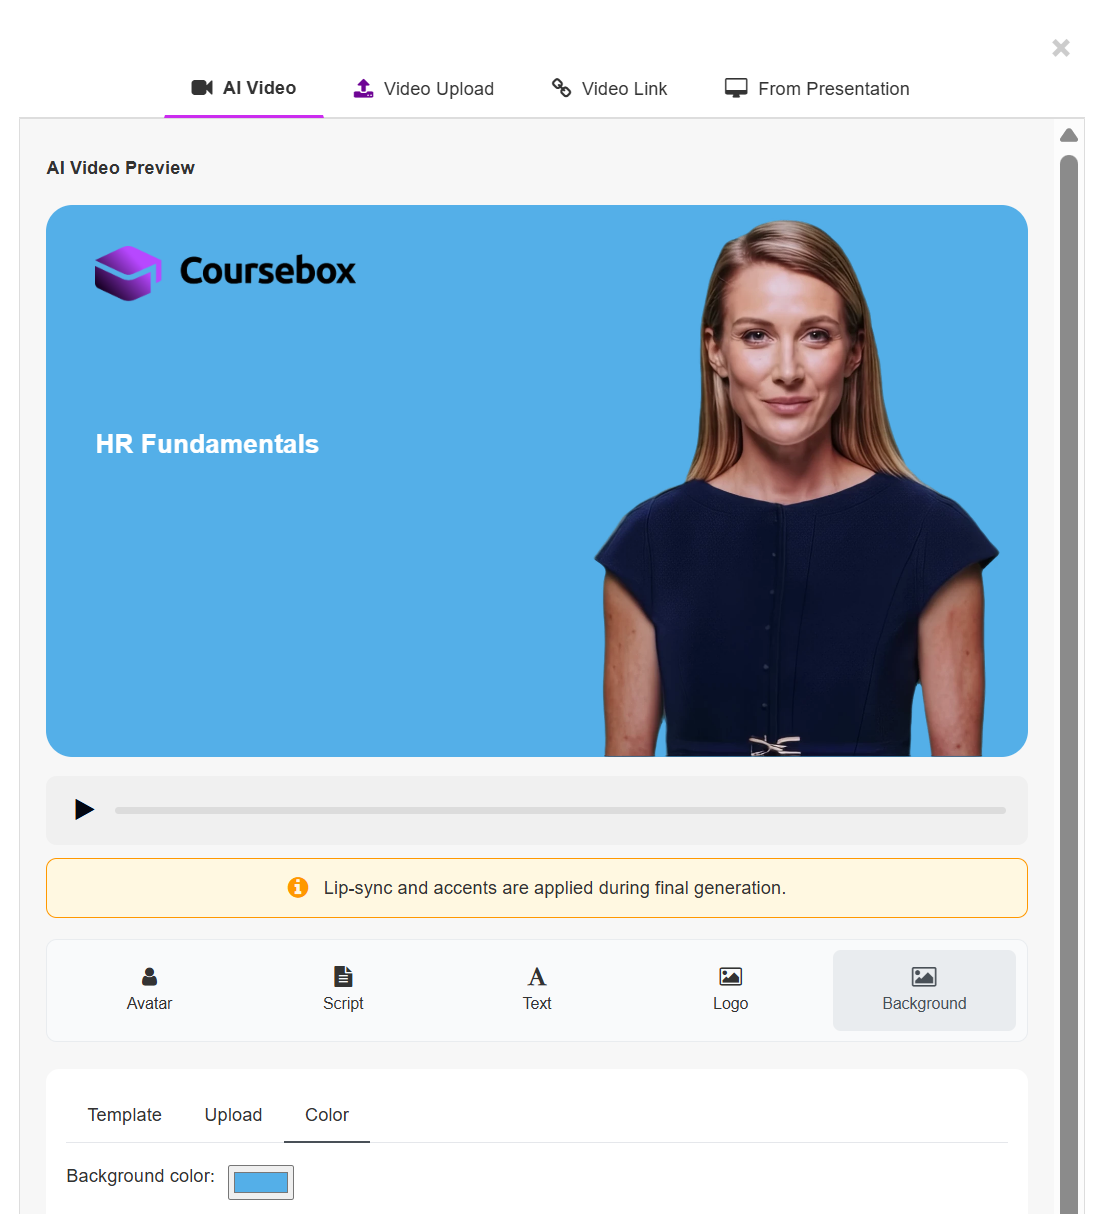
Tip: Tick "Hide the block" if you prefer a full-width video style.
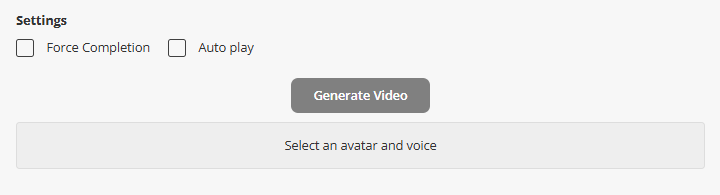
Adjust Settings
At the bottom of the editor, configure playback options:
Force Completion - When enabled:
Learners must watch the entire video before progressing.
Auto Play - When enabled:
The video will automatically begin playing when the page loads.
Video Upload
If you already have a video you'd like to use. You can upload it directly to your course. This option is perfect for including pre-recorded training sessions, presentations, or tutorials you've created outside the platform.
In the Advance Options, you can select Force completion to require learners to watch the video before continuing and/or Auto Play the video.
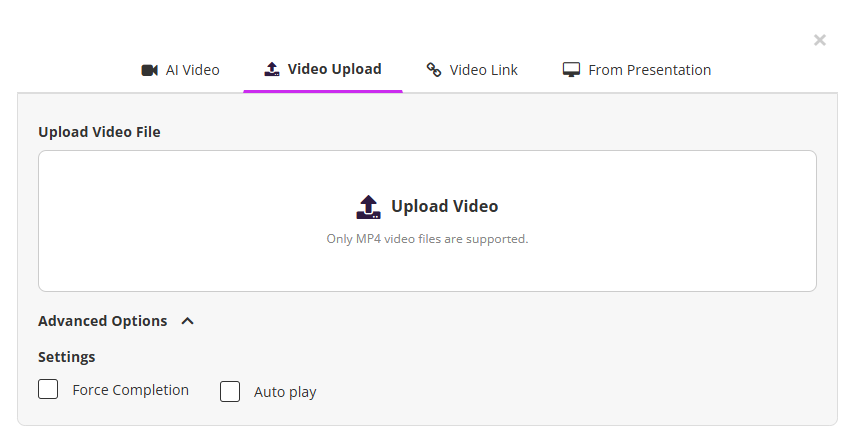
Note: Coursebox does not support in-platform video editing. If you need to edit a video (for example, trim, cut, add captions, or update visuals), this must be done in an external video-editing program. Once edited, simply re-upload the updated video to your course.
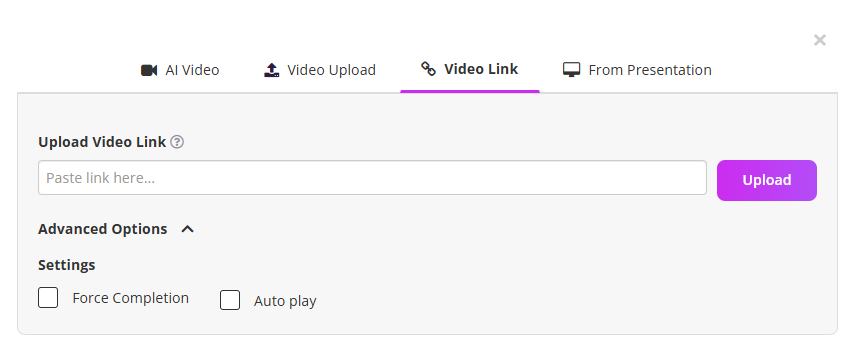
Video Link
You can also embed videos from platforms like YouTube, Vimeo or Loom by simply pasting the video link. This is a great way to incorporate external content and keep your learners connected to high-quality video resources.
From Presentation
Navigate to the AI Video section.
Click on From Presentation at the top menu.
You’ll see the presentation workspace.
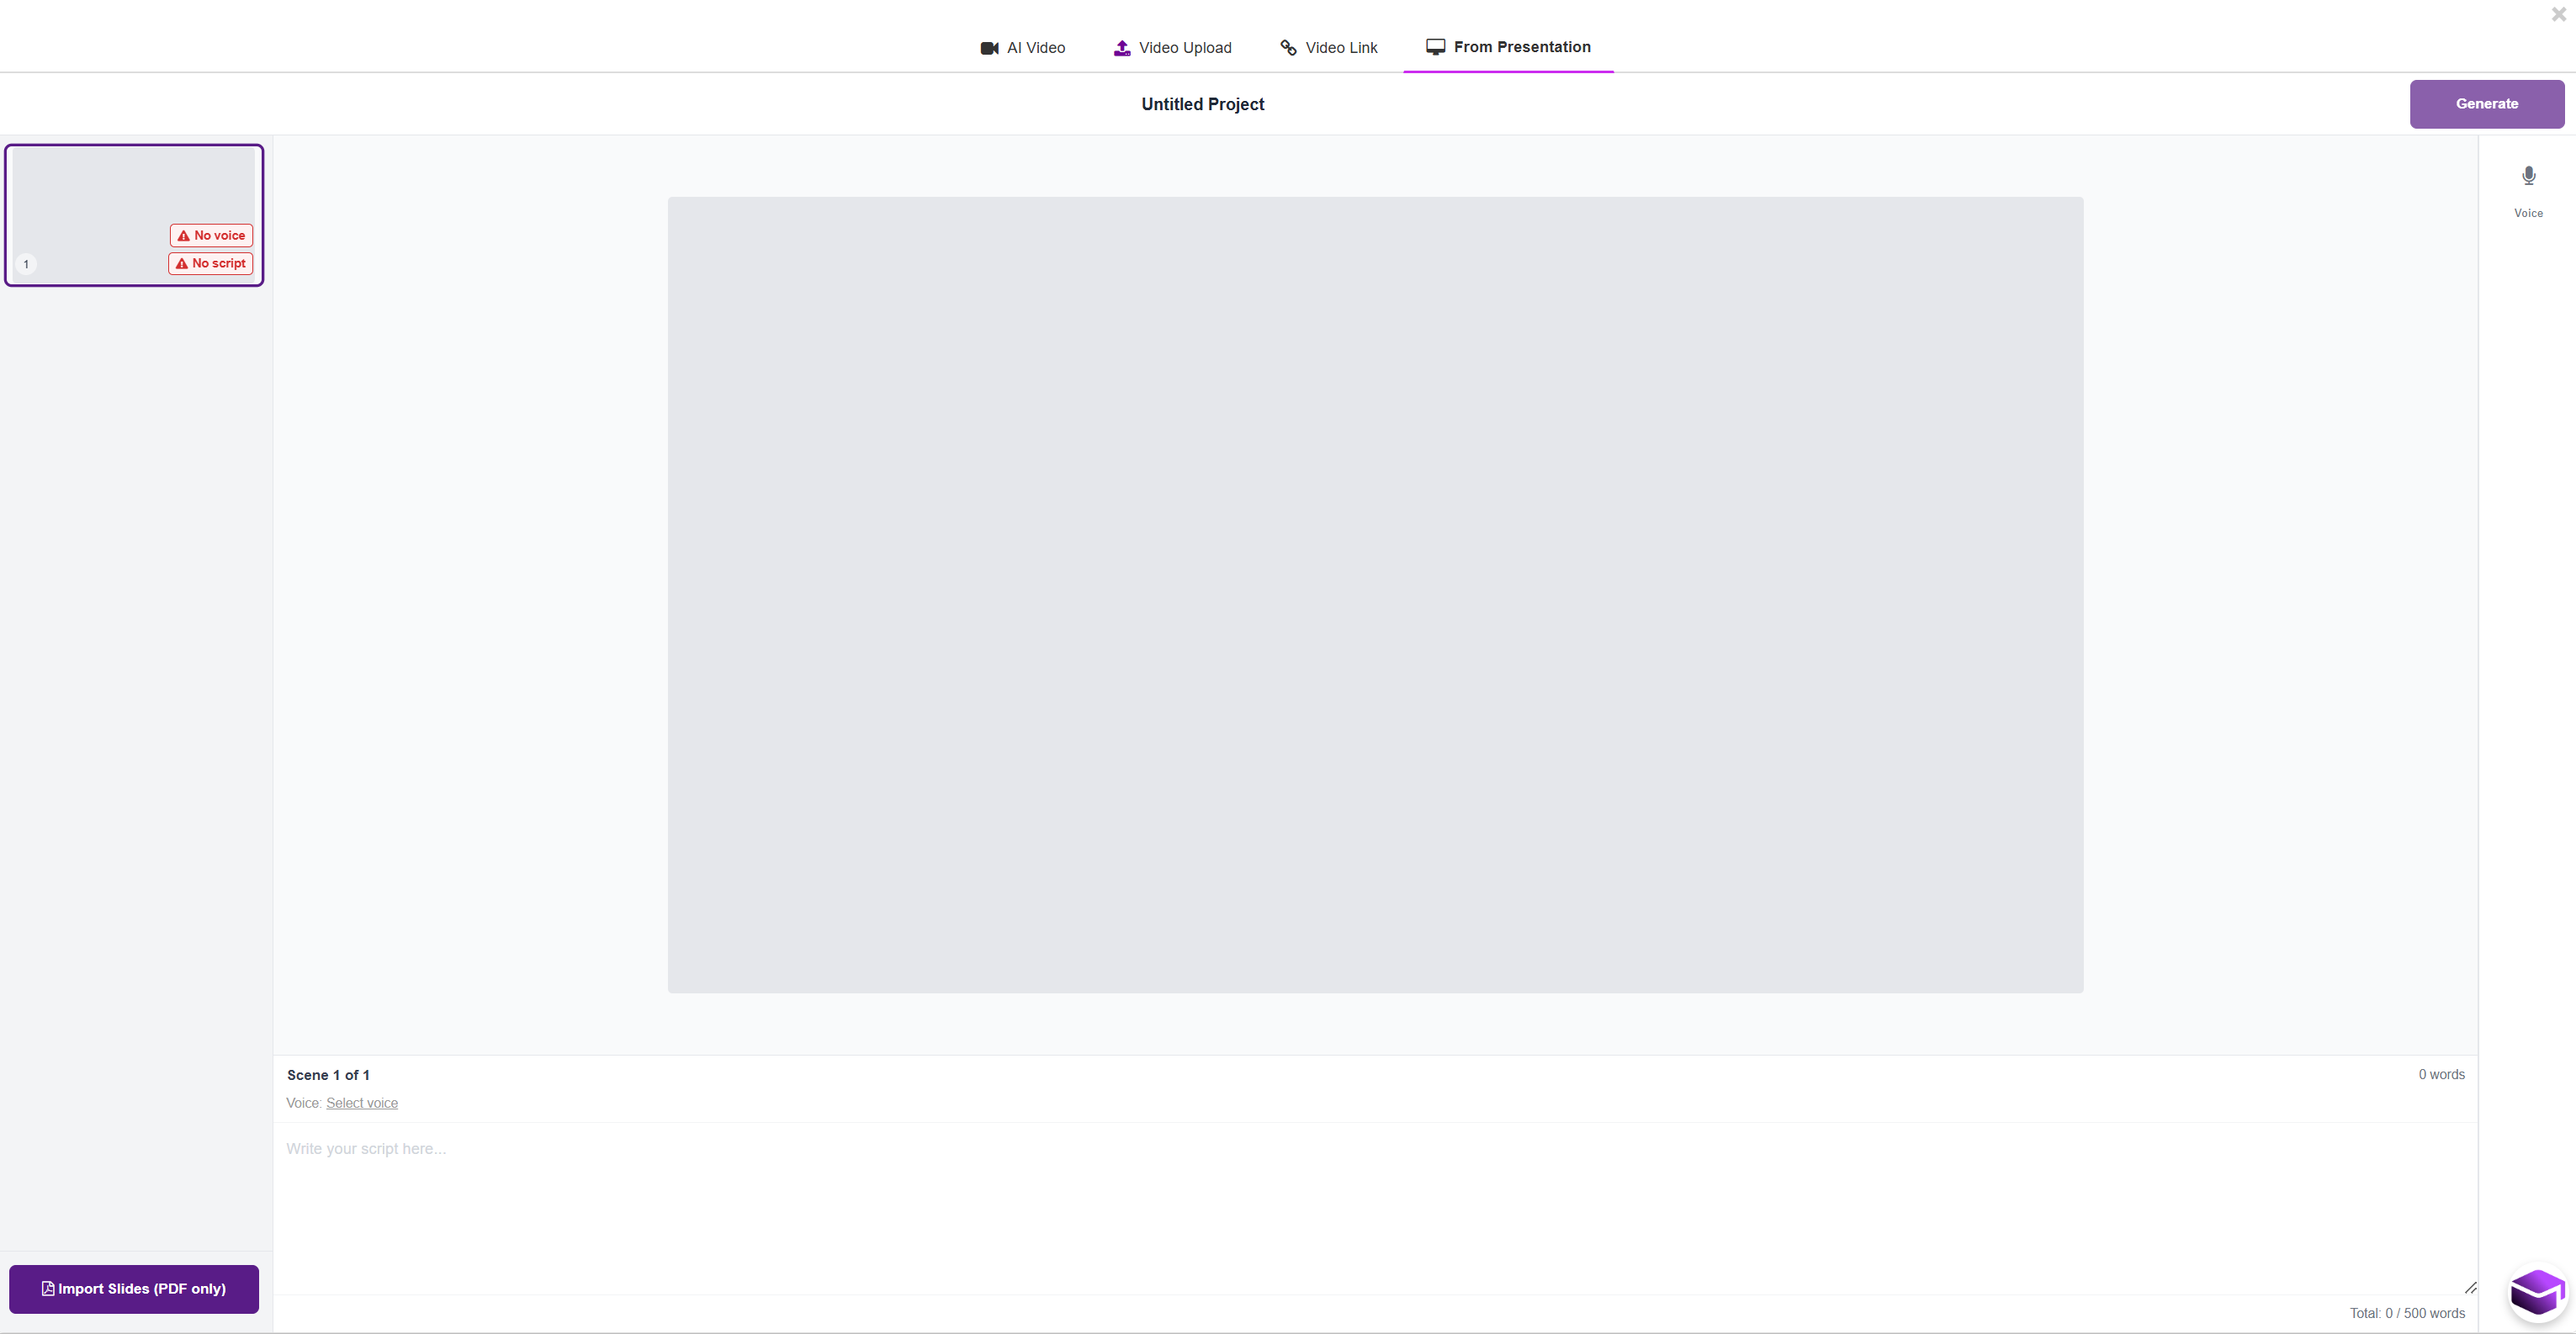
Click the Import Slides (PDF only) button (bottom left).
Upload your presentation file in PDF format.
Once uploaded, your slides will automatically appear as scenes.
Each slide becomes a separate video scene.
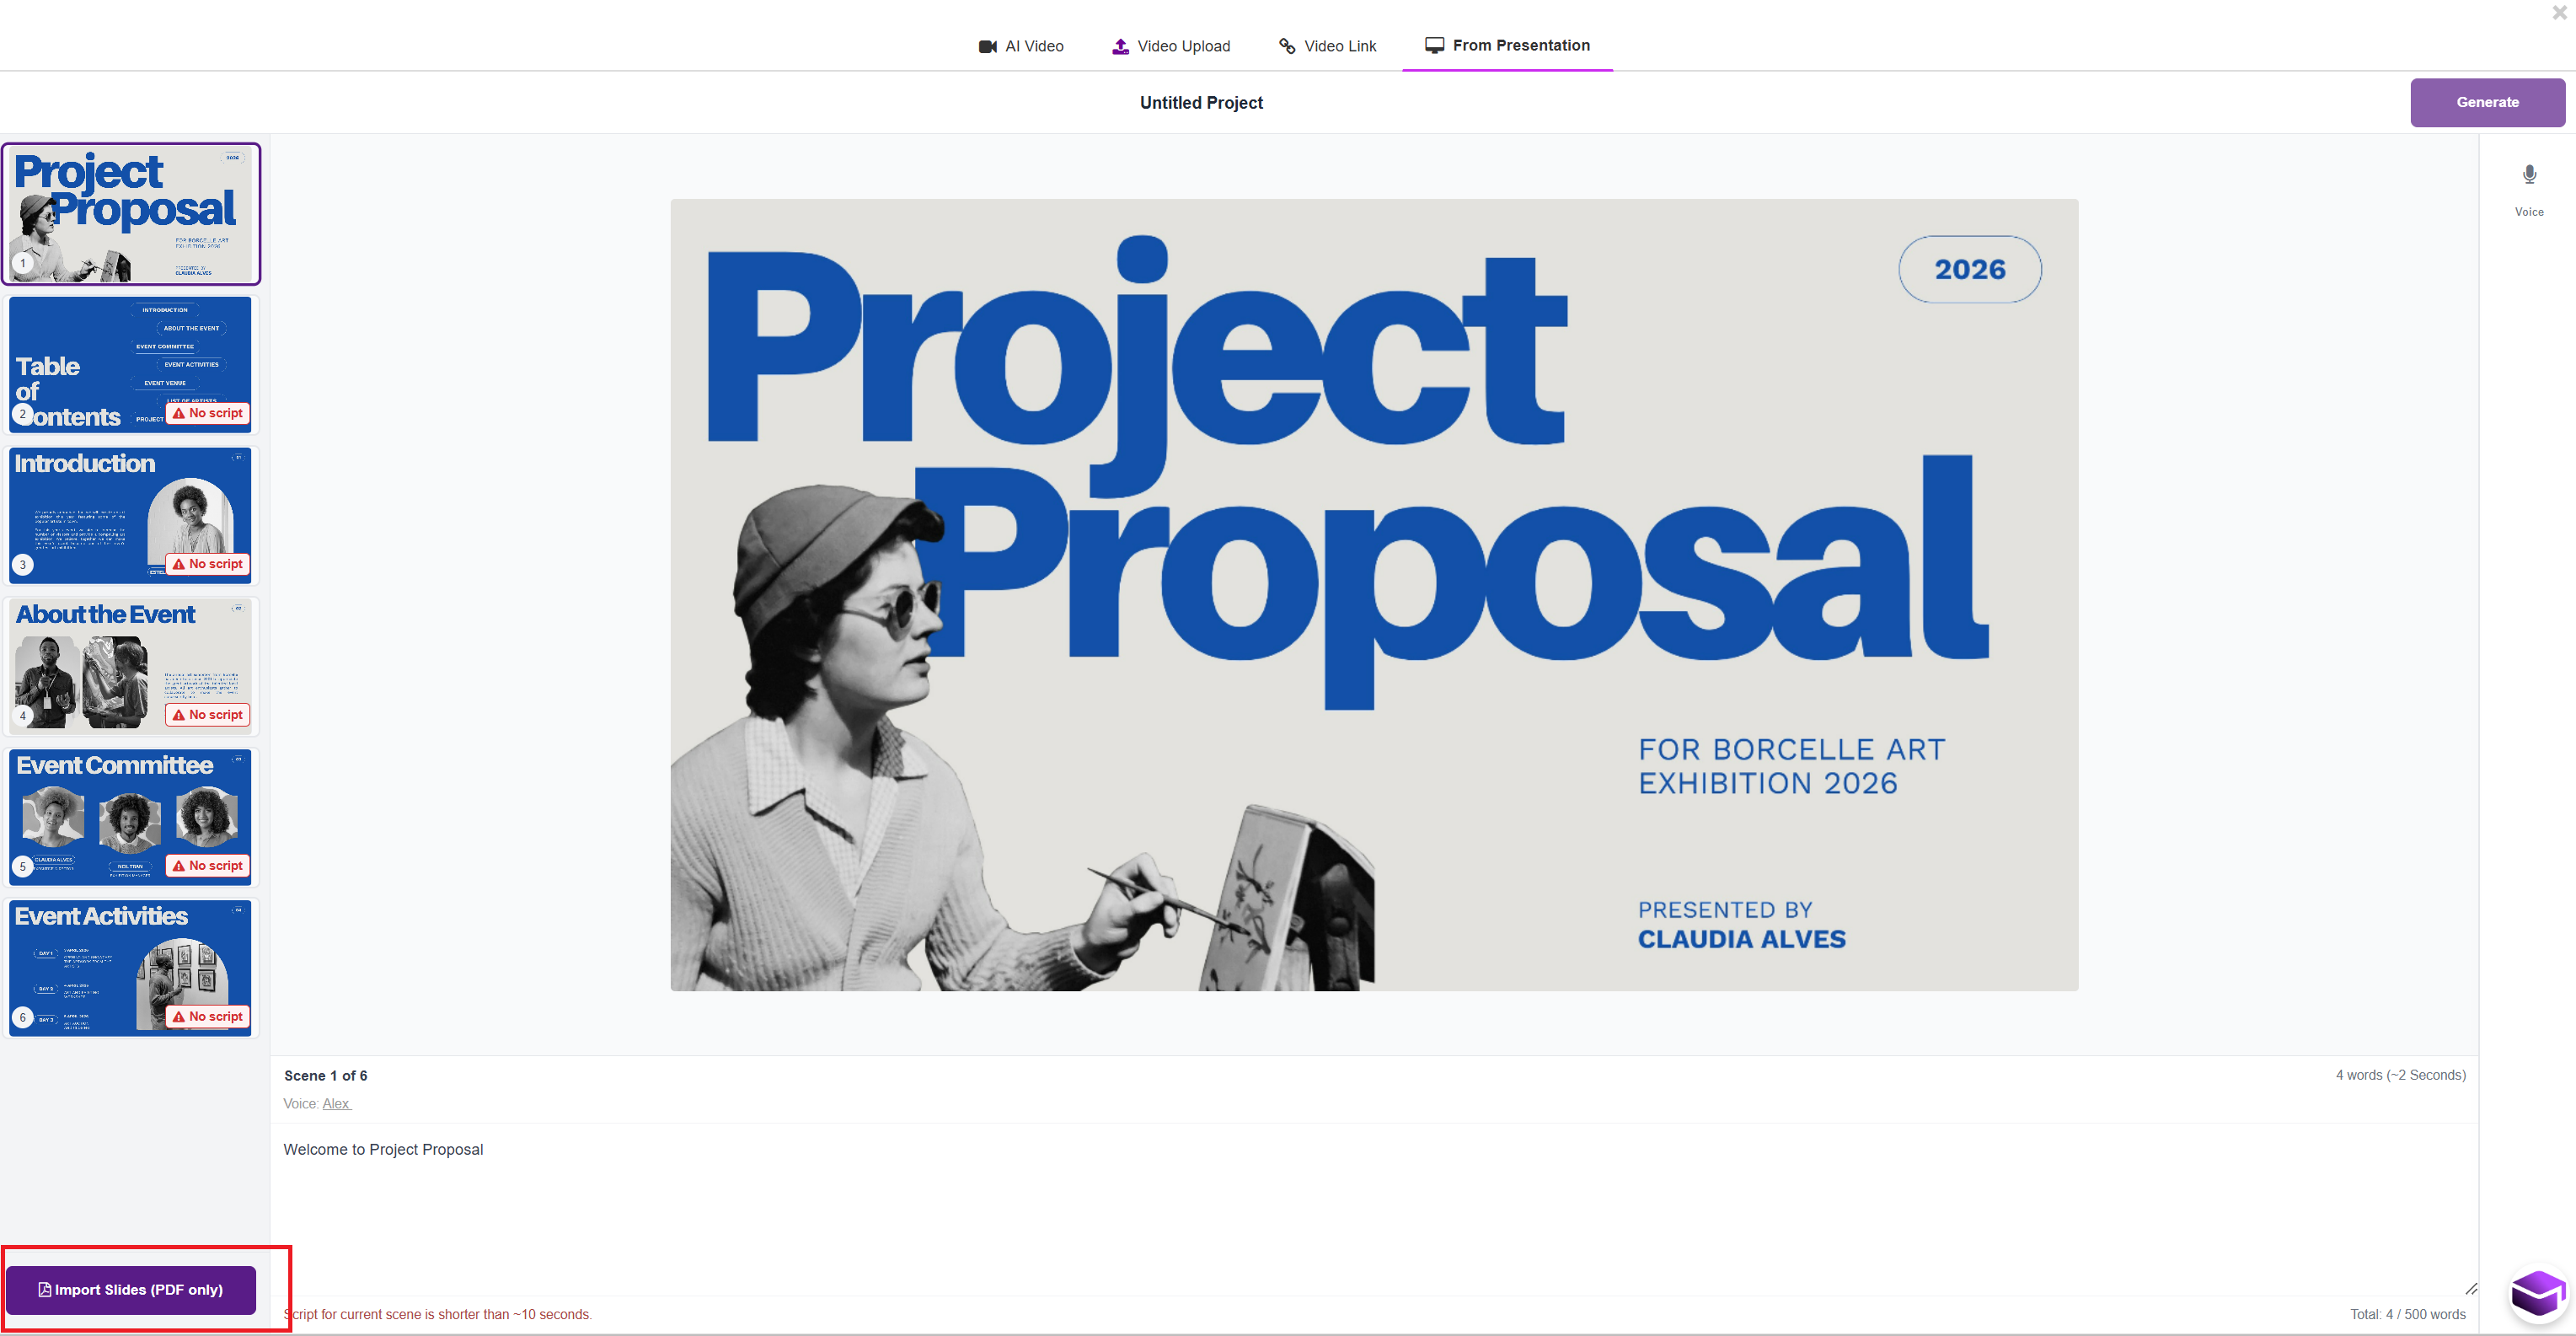
Select a slide (scene) from the left panel.
In the script area below the slide Add your narration text
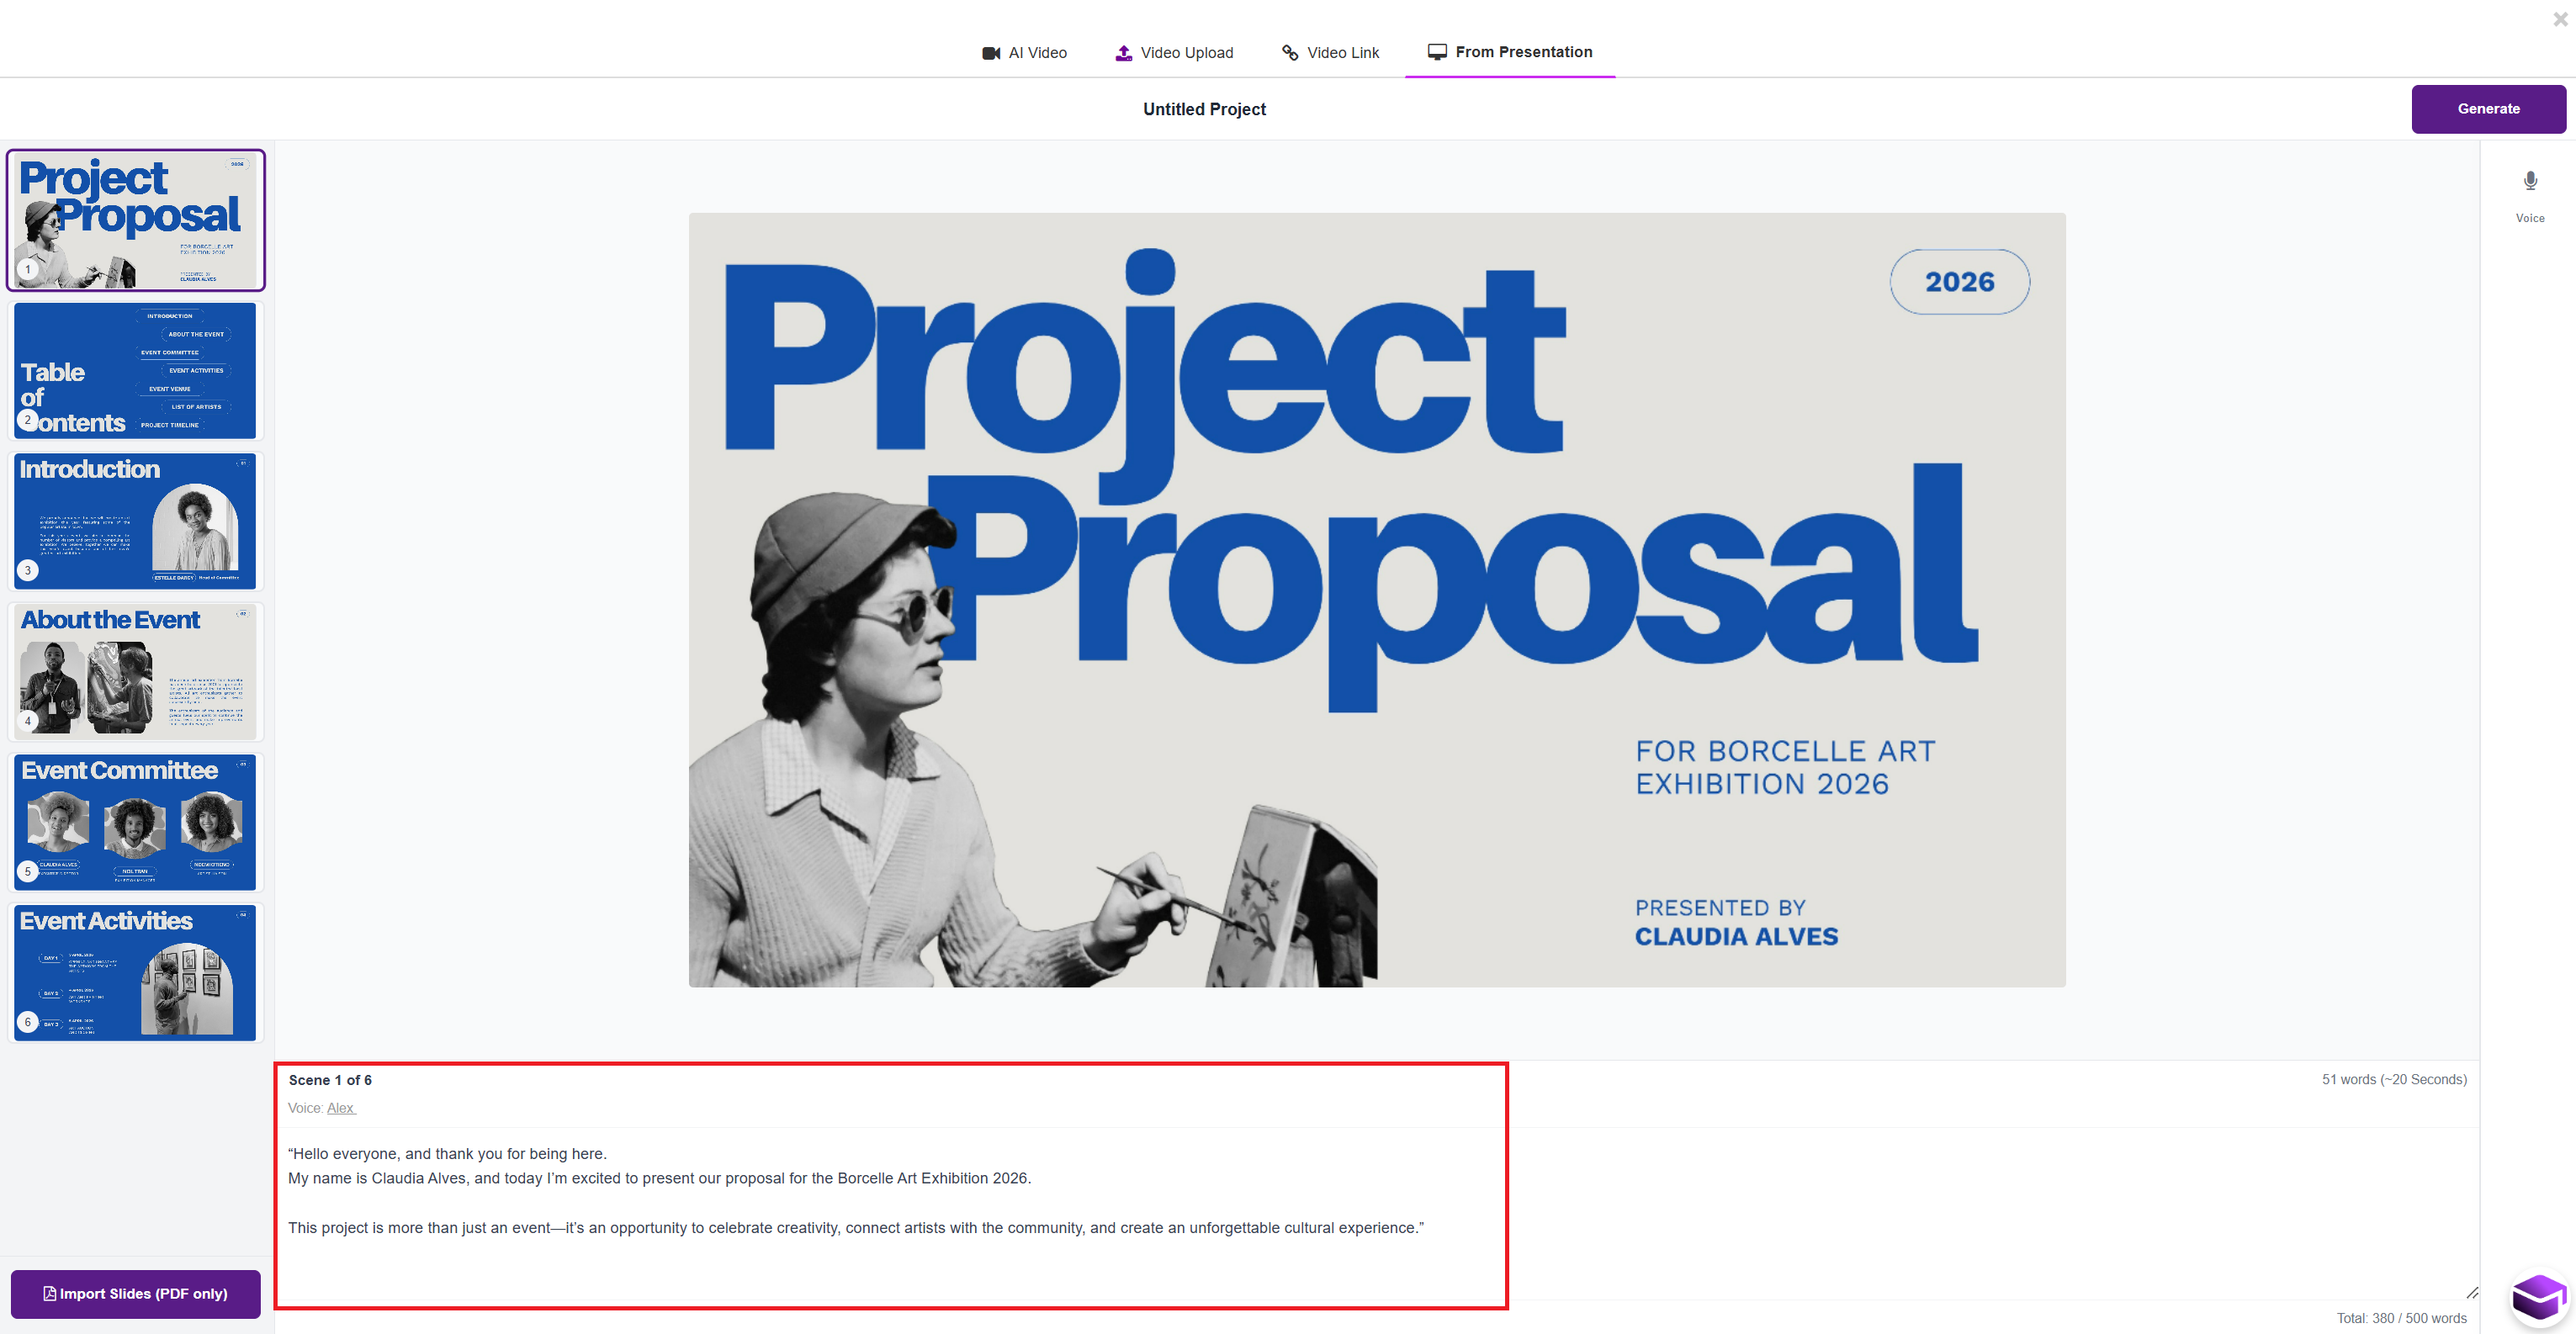
Ensure your script is:
Clear and conversational
At least 10 seconds long for better output
Tip: Aim for approximately 40 to 70 words per slide.
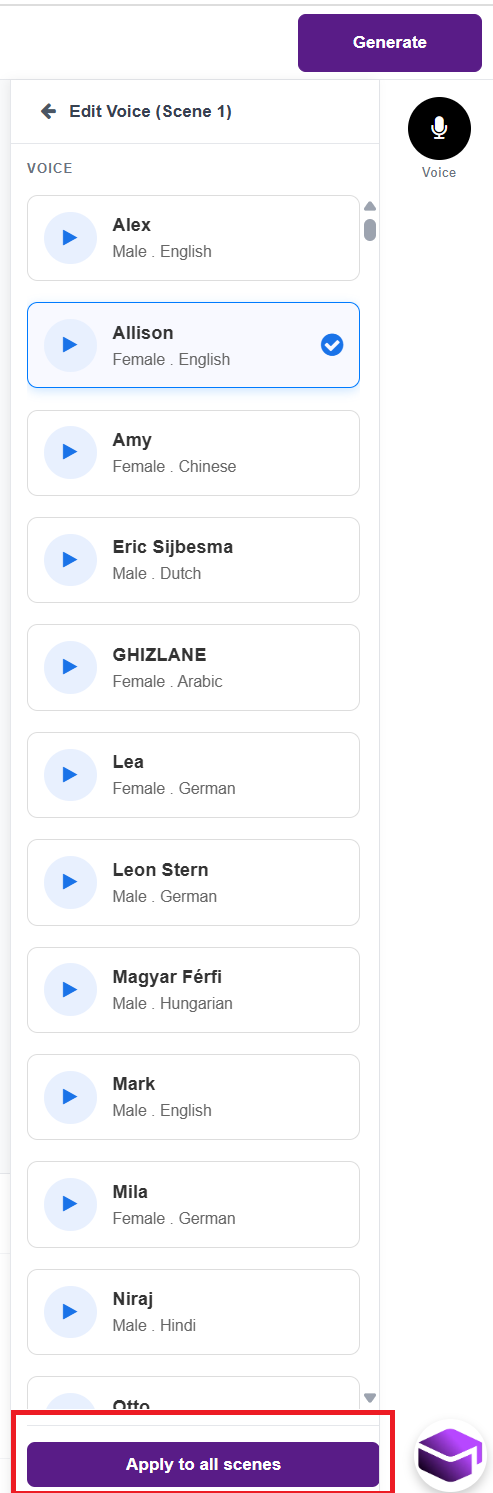
Click on the Voice option.
Preview different voices (e.g., Alex, Allison, Amy).
Select your preferred voice.
Click Apply to all scenes to keep consistency across the video.
Once all slides have scripts and voice selected:
Click the Generate button (top right).
The platform will:
Convert your slides into scenes
Add voice-over narration
Produce your AI video
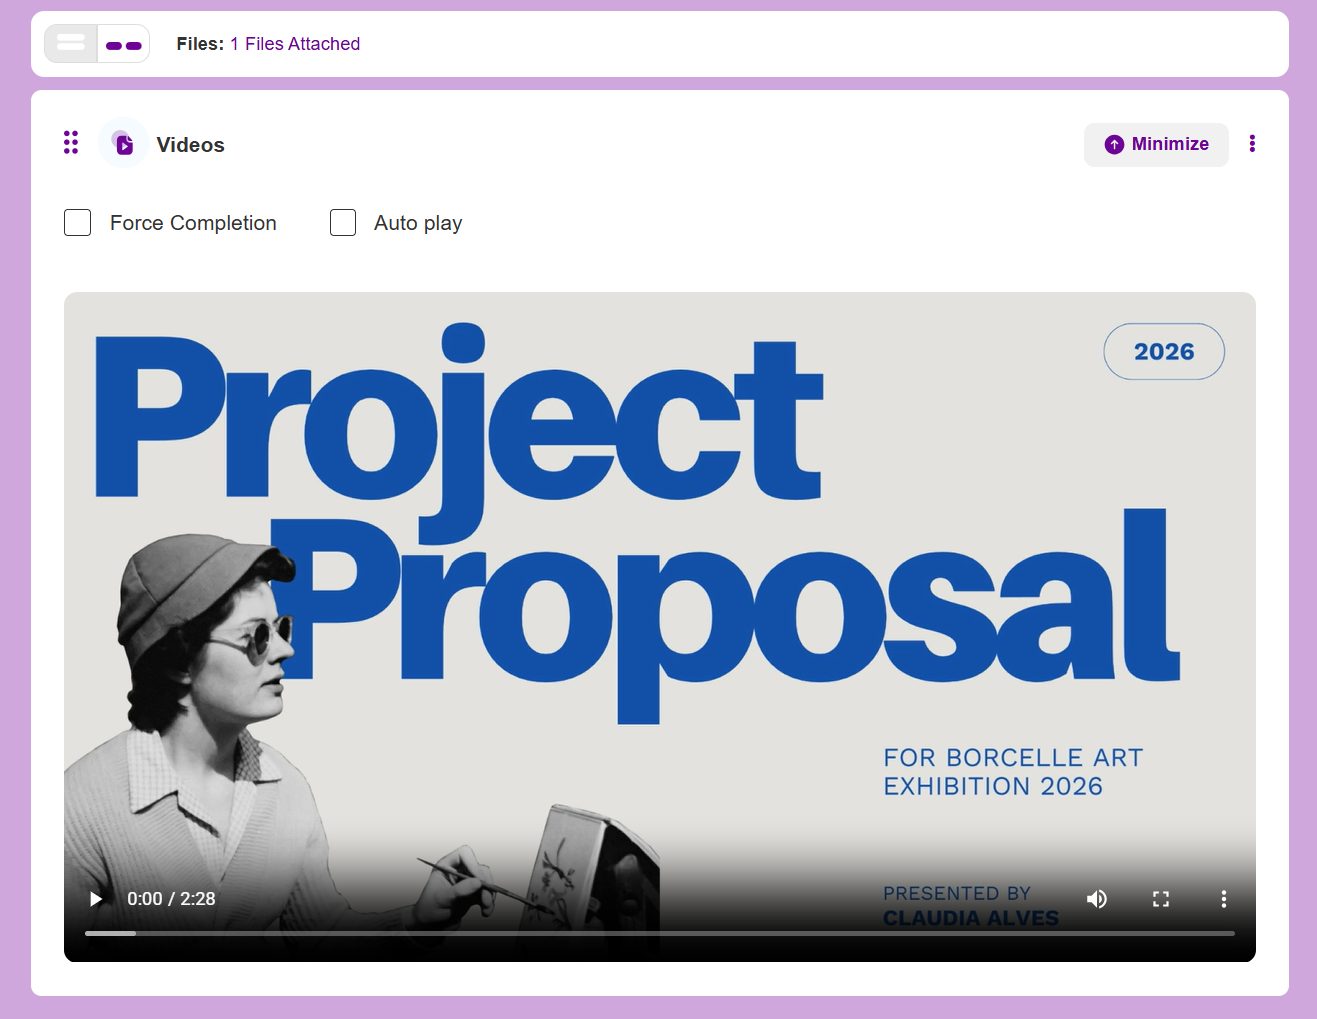
Delete a Video from a Carousel
If your content block has more than one video in a carousel, and you want to remove one of them (e.g., the first video), follow these steps:
Go to the page where your video carousel is located.
Select the video you want to delete by navigating to it using the arrow buttons on the video player.
Click the three-dot menu (⋮) at the top right corner of the video block.
Select “Delete” from the dropdown options

Note: Ensure you are viewing the correct video in the carousel before deleting, as there is no undo option.
You can also choose “Hide content” if you don’t want to permanently delete the video but prefer to keep it invisible to learners.
Add Google, Canva or PowerPoint Slides
The Slides feature allows you to present content in a slide-by-slide format, similar to a presentation. Click Add Item and choose Slides from the dropdown menu. This is perfect for breaking down information into digestible chunks, guiding learners through a sequence, or delivering visual-heavy content in a structured, engaging way.
The Steps are:
Select Multimedia and Slides from the bottom menu
When the following screen appears. Choose Google Slides, Canva or PowerPoint presentation and upload from your computer or a Link, then click Open to upload them to Coursebox.
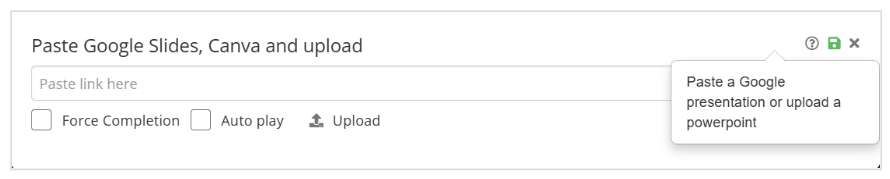
The file will appear at the bottom of the popup screen, then click save to add the presentation to your course.
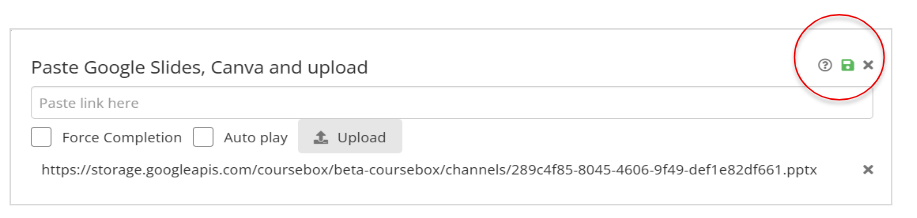
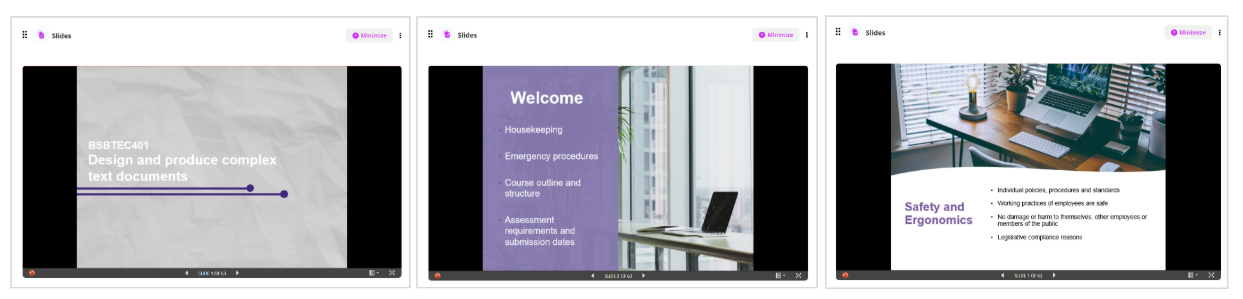
Your selected presentation will be displayed as a slide gallery, and learners can use the left and right navigation icons to browse through the collection. This is a great way to showcase visual content in an engaging format.
Note: Enable Force Completion if you require learners to click through every slide before progressing.

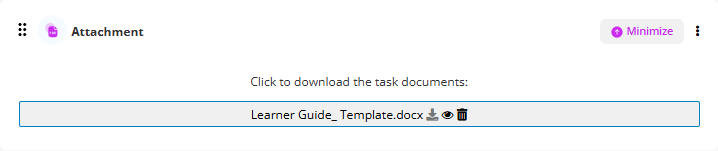
Attach Downloadable File
The Attachment feature in Coursebox allows you to upload and share downloadable files—such as PDFs, Word documents, spreadsheets, or presentations—directly within your course. This is ideal for providing learners with handouts, worksheets, guides, or any supporting resources they can access offline.
Select Multimedia and Downloadable File from the bottom menu
Upload an attachment File. The following screen will appear in your course.
Best practice:
To avoid confusion, add a short line of text above the attachment using the text editor, for example:
Download the full chapter (PDF) – optional
Then place the Downloadable File block directly underneath.
This makes it clear that the file is a resource, not an assessed task.
Embed a Pdf
The Embedded PDF feature allows you to display PDF documents directly within your course content. Instead of requiring downloads, learners can scroll through the file right on the page. This is ideal for sharing guides, reports, manuals, or worksheets in a seamless and accessible format. Simply upload your PDF and it will appear embedded for easy viewing.
The Steps are:
Select Multimedia and Embed Pdf from the bottom menu
Upload a PDF File, Use the file upload tool (usually via the media or file icon) to upload your PDF. Ensure the file contains embedded images.